Upcycle your Tin Cans to make these DIY Tin Can Lanterns. Check out the easy tutorial!

Required material
- Tin Can
- Sheet
- Pen
- Hammer
- Nail
- Wire
- Scissor
- Tape
1. Sheet of Paper
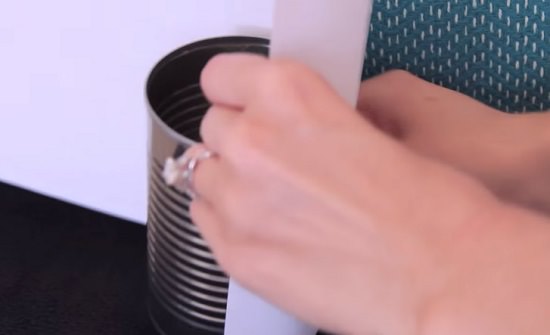
Take a paper and wrap it around the tin can.
2. Marked on sheet

Mark the extra sheet of paper from the bottom of the can.
3. Cut Extra Part

Cut the marked area of the paper using a pair of scissors.
4. Make Dots
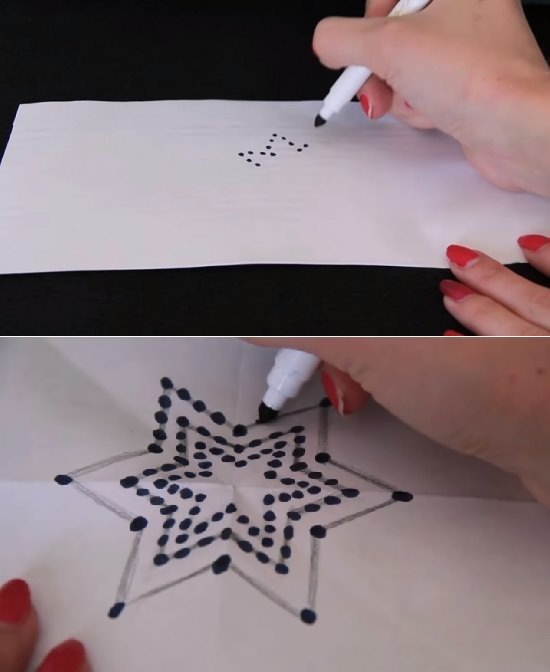
Make a star design using the dot drawing technique.
5. Glue Sheet

Stick the designed sheet to the can using tape or glue gun.
6. Make holes
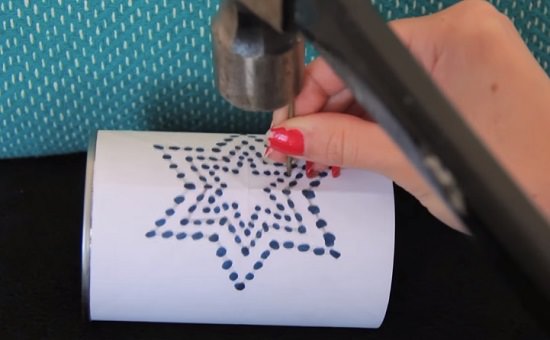
Using a hammer and a nail, hammer the nails through the dots. Be careful while hammering the nails!
NOTE: Freeze water in the can before hammering to make it easy to hammer nails through the can!
7. Spray Paint

Either stop at the previous step or you can proceed by painting the can to give it a shining look. Use weather proof paint if you are planning to hang it outside.
8. Making Wire Handle
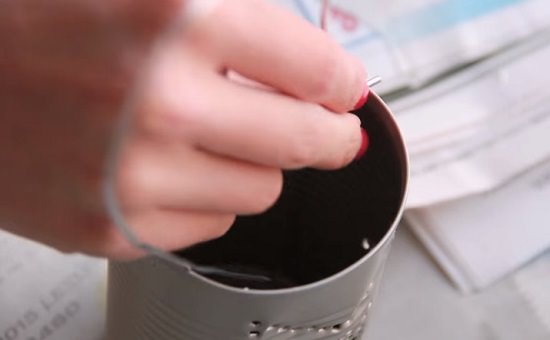
Hammer two holes at the top of the can and use wires to make a handle for your lantern. Bend the outer ends of the wires.
9. Votive

Put a flameless votive inside the can to complete the project!
Hang it!

Enjoy the beauty of your can lantern and hang it somewhere in your home or in the garden.